Introduction
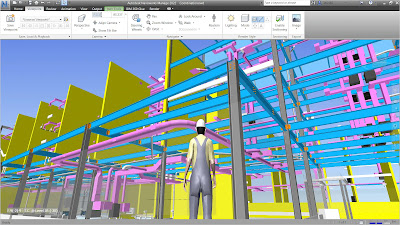
Building Information Modelling is one of the emerging trend in construction industry majorly post Covid. AEC industry of India contributes nearly about 11% of India's GDP with participation of 35 Billion people leading to second largest industry in India. BIM is a process to generate clash free 3D Information models through group of software's. ArchiCAD being one of the software used to create 3D informational models. ArchiCAD is developed by Graphisoft a Hungarian Company. ArchiCAD offers computer aided solutions for handling all common aspects of aesthetics and engineering during the whole design process of the built environment buildings, Interiors, urban areas etc. Let us see the procedure of constructing a structure model in ArchiCAD.
Procedure
1. New Project Creation - Assuming
you have installed the ArchiCAD 24 version in your PC Now
create a new project from File option in top bar i.e. File tab (top left bar), select new option and click on New project tab.
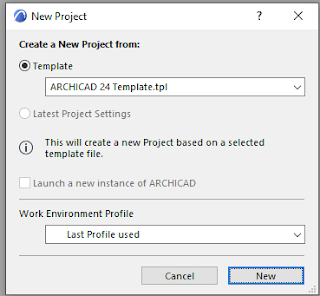 |
| New Project Tab |
2. Adding Story Levels - The First step to create a structural model in ArchiCAD is to set the story levels by giving command Clt+7 the following tab as shown in picture will appear on screen. Refer levels form Architectural Elevation for Superstructure & Section from Foundation Plan for Substructure levels. The naming standards for story's will be same as that of naming standards followed in respective CAD files.
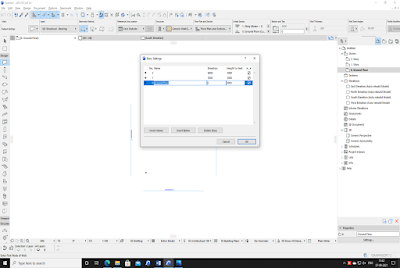 |
Story Settings Tab
|
3. Creation
of Worksheets – After setting the
story levels the next step is create the Worksheets. In the right corner of
screen, you will see the worksheet option right click on it & select the
new Independent Worksheet option the following tab will appear on screen. Name
the worksheet as per requirement & create the worksheet.
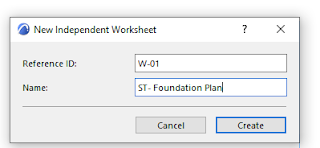 |
Worksheet Tab
|
4. Adding
Structural Drawings in Worksheets
- There are basically two ways to add
drawings in worksheet as shown below.
Option 1 - From top bar select File option - External Content - Attach Xref, once done the following
tab will appear on the screen. Select on Browse & add the structural
drawing from saved folder in your PC. (In select missing file tab select skip
all). Once the drawing is attached in the worksheet (in case drawing is not visible click on zoom out option in lower tab)
right click on the drawing & unlock all layers.
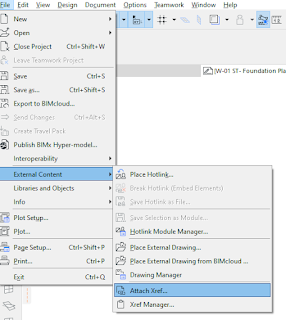 |
| Adding Drawings in worksheet by option 1 |
Now to set a Reference point select a point or
intersection point of grids as reference point & overlap that point on ‘x’
mark in worksheet as shown in below figures.
Use command Clt+D to move the drawing.
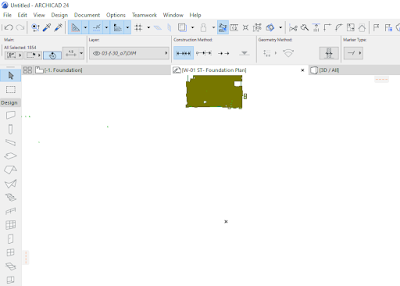 |
| Marking the reference point |
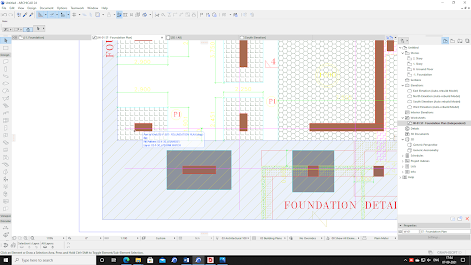 |
Overlap reference point with CAD Drawing
|
Note this reference point will be same throughout the
worksheets of buildings so as to trace drawings with same reference at
different levels.
Option 2 - From the left side
bar select the Document tab - Drawing tool click on some point in the worksheet
(Relink drawing tab will appear) Select on the browse option, select the unit
& attach the drawing from your PC. Rest adapt the same procedure to set the
reference drawing.
5. Trace the worksheet on Floor Plan - Right click on the created worksheet & select the Trace as reference option. Now open the story of same drawing & Click on the trace icon (Alt+F2) from top bar.
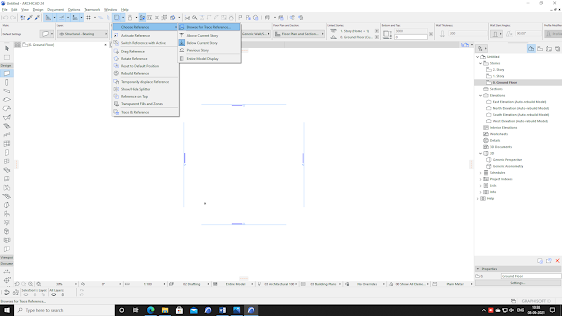 |
Tracing of Worksheet
|
Most useful commands in ArchiCAD
- Clt+T Command - When you select any element & press control + T command you will find the element selected tool settings will appear on screen.
- Geometry & Positioning Settings - Here you will find the Story settings where you can set the home story of an element settings & can also set the top story. Also here you can set the material layer & Reference Plane.
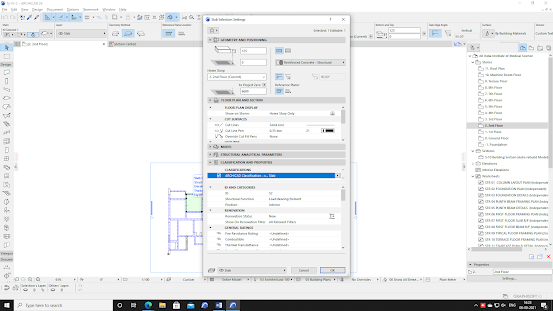 |
Geometry Settings
|
- Floor Plan & Section Settings - In this part the first option would be ‘Show on stories’ which consists of two sub – options
- All relevant stories – It means the selected elements would be shown on all floors as trace mark for reference in editable form.
- Home Story only – In this option the elements are visible only on home story.
- Outlines - In this function you will find the options to edit the edges colour of different elements.
- Classification & Sections – This option consists of ID & Categories option were we can feed ID number to different elements which can be used in schedules derive for quantities.
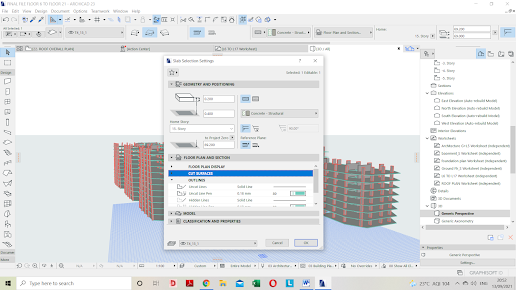 |
| Element Selection Settings |
- Creation of Layers – The shortcut to active this command is Clt + L, once this command is active the tab as shown in fig will be displayed on the screen. To create the new layers select the option new from right corner & set a name for the layer. The layer will appear on the display board.
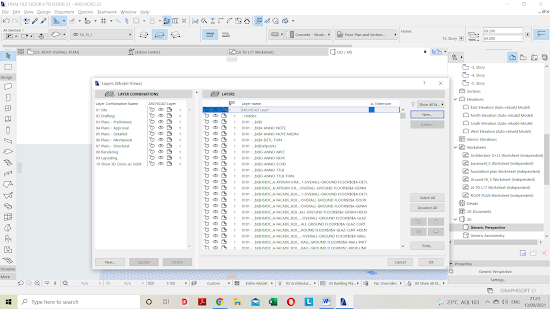 |
| Layer Creation Tab |


