3D Walkthrough is created for an exciting experience to showcase exact replica of project that will be created in future. Walkthrough movie or video is basically a computer programed animation created to show detailing of particular project to various stakeholders involved in the project. It helps for better visualization & to get brief idea of multiple disciplines involved in the project. Introducing 3D walkthrough in residential projects has been a game changer not only for designers, project managers but also for consumers to get brief idea of what really are they investing it.
 |
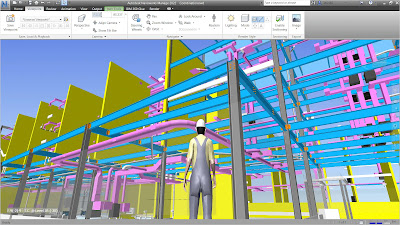
3D Walk through in Navisworks (Source - Google)
|
Step 1 - Transferring 3D Model from Revit to Navisworks
To create a 3D Walkthrough, it's very obvious that we need to create a 3D model based on CAD Drawings of a particular project. Once the 3D model is created in Revit software, we need to transfer it to Navisworks in either .nwc or .nwd format.
- To transfer the Revit file, click on Revit Icon on top left corner.
- Then select save as option and save the file in .nwc or .nwd format.
- Now Open Navisworks, Append the same file in Navisworks. The 3D model will appear in Navisworks Interface.
 |
| Navisworks Interface (with Append option highlighted) |
Step 2 - Use of Animator option in Navisworks
Once all disciplines models are append in Navisworks, we then have to proceed with animate option to showcase the model path, to showcase project progress or to showcase the moments of machinery of certain project. In 3D walkthrough we intend to create exact replica of what the project would be in future.
- Select the Animator option from 'Home' tab in Upper Ribbon.
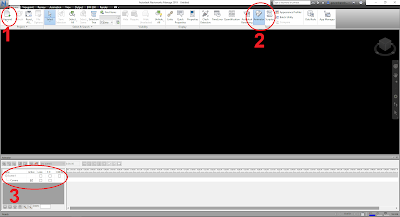
- Animator tab will appear on screen (on lower side as shown in reference image 1).
- Now Add Scene in the Animator tab & Add camera in created scene to add the path. (Right click and select add Scene. Now right click on scene and select add camera --- Select Blank camera.)
.png) |
| Reference Image 1 |
Reference Image 1
- Append option to import .nwd or .nwc files.
- Animator option
- Setting up Scene and Camera
Step 3 - Animation Timing & Path
Setting up the path for walkthrough with time aspect is one of the major steps in creating 3D walkthrough. following are the steps to set path and timing -
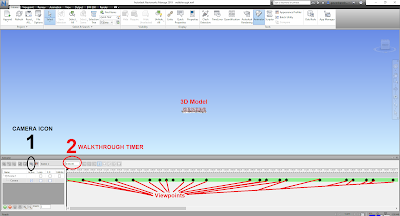
- Click on the Camera (added in scene explained in step 2) to active it.
- Click on the camera icon to get Viewpoint and set timing for that particular patch as shown in reference image 2 below.
- Set the path of walkthrough with mouse scrolling options and set the timing at each viewpoint. continue the process till end viewpoint.
- Once we have completed the process of attaching path and timing to 3D model, we can export the walkthrough video by selecting Animation option from top bar and selecting Export animation option.
.png) |
| Reference Image 2 |
Thanks to Mr Vishal Verma for guiding me on "How to create a 3D Walkthrough in Navisworks".


.png)
.png)
