Friday, 28 July 2017

The Indian Rupee Will Make you feel Rich.

Every one has a dream to go abroad and explore world but most of us eliminate the idea by the fear of cost. But here are some countries where Indian currency will make you rich.

These countries are also the best option for us to have start-up industries or to have Indian owned Multinational Companies Branches in these countries.


1) Bolivia: 1 Bolivian Boliviano = 9.28 Indian Rupee.

2) Paraguay : 1 INR = 74.26 Guarani.

3) Zimbabwe: 1 INR = 5.85 ZWD.

4) Costa Rica : 1 INR = 8.15 Colons.

5) Belarus : 1 INR = 216 Ruble.

6) Cambodia : 1 INR = 63.93 Riel.

7) Vietnam : 1 INR = 338.35 Dong.

8) Mongolia : 1 INR = 29.83 Tugrik.

9) Hungary : 1 INR = 4.22 Forint.

10) Nepal : 1 INR = 1.6 Nepalese Rupee.

11) Sri Lanka : 1 INR = 2.08 Sri Lankan Rupee.

12) Algeria : 1 INR = 1.63 Algerian Dinars.

13) Indonesia: 1 INR = 197 Indonesian Rupiah.

14) Japan: 1 INR = 1.73 Japanese Yen.

15) Iceland: 1INR = 1.72  Icelandic Krona.

16) Chile: 1INR = approximately 10 Chilean Peso.

17) Uzbekistan: 1INR =  44.76 Uzbekistani Som.

18) Djibouti: 1INR = 2.65 Djiboutian Franc.

19) Yemen: 1INR = 3.74 Yemeni Rial.

20) South Korea : 1 INR =  16.52 South Korean Won.

21) Laos 1 INR = 120.35 Laotian Kip.


Indian Currency may be less as compared to the currency of developed nations like USA and UK but Indian currency is far more rich currency in many countries of world as stated above.

We can not only choose the above stated countries for our holidays but also can setup industries in these countries in low amount. However there are some factors that are to be taken into consideration before setting up industries in these countries.


Wednesday, 28 June 2017

Visit to Precast concrete Industry in Yekaterinburg.

The first industrial visit was organised by Ural Federal University for UG Fellowship students.The visit was organised at Precast Concrete Factory named "ATOMSTROI KOMPLEX" in Yekaterinburg. The company was set up in Yekaterinburg 13 years ago.


The first step of making Precast concrete blocks is bringing the raw materials and mixing them in a mixer according to its requirements. The raw materials used are Gypsum lime cement ash or pfa and aluminum.

These raw materials are brought and placed in mixers according to requirement of concrete block material design. After the mixing process hardening of concrete takes place.

The operator operates the whole process with the help of an software shown in fig.


After the mixing process and hardening process is over we get the concrete block as shown in figure.


After this process the concrete block is tilted with 90 degree angel just to make cutting procedure easier.


After the tilting procedure is done the block is taken to 3 steps cutting procedure where the concrete block is cut as per the requirement.

In first step the block goes through horizontal cutting process.

In second step the concrete block undergoes with vertical cutting process.

In third step the concrete block undergoes with cutting blocks as per required dimension the extra concrete is again send for its  reuse process.


Then the cake is send to Autoclave for final hardening of the blocks. The Autoclave is 37m wide and the blocks are kept for 12 hours at 120 to 180 degree Celsius.


After 12 hours the block are taken out of Autoclave and then are send to wrapping sections were the blocks are wrapped with help of machines to save the blocks from rain and sort of stuffs.


The company has the ability to make Precast slabs as well as Precast stairs. The company works throughout the day with certain shifts.


Thursday, 15 June 2017

Design Of Steel Structures with Russian Standards

Their are basically 5 steps of design in  Russian system

1) Development of Design scheme.
2) Determination of Loads.
3) Calculation of Internal forces in Elements.
4) Selection of Cross Section.
5) Check for Designed Cross Section.


Loads & Loads Combination

INDIAN CODES :-

•) In India the Calculation of Dead load, Live Load & Wind load are done with reference of IS 875.

•) The Specialized Information of Industrial Buildings is provided by some codes like
IS 807.

•) For  Design of Earthquake Loads in India the reference of IS 1893 is taken into consideration.

•) For Design of  Towers & Other Forms of Structure the codes taken into consideration are IS 802, IS 9178, IS 6533.


RUSSIAN CODES :-

The Basic data on all types of loads except the earthquake loads are given in SP20.13300.2011 loads and effects code.

For Design of Earthquake loads or Sesmic Loads SP14.13330.2011 is taken into consideration.


Weight of Some Building Materials as per Russian Standards.


Loads & Effects

In Russian Standards all the loads are divided in two groups depending upon its duration and action.

1) Dead Load (Permanent): It includes the weight of Structures, Weight of Soil & pressure for underground soils, forces from prestress.

2) Live Load (Temporary): These loads are further divided into two sub category

2.a) Long Time loads like Store goods, machines in industrial Buildings, Pressure of Fluids Etc.

2.b) Short Time loads like Weight of People, Weight of Snow & Wind loads.

There is one special category designed for Earthquake loads and loads caused due to sudden breaches of technological process.


The load has two values-
a) Unfactored Load &
b) Design Load.


Unfactored Load ie Specified Characteristic Load are the loads that acts on structure during its operation.

Design Loads are the maximum possible loads that can act on structure.


Formula-     P = P^n  × (gamma)f

Where P.     = Design Load
         P^n.    = Unfactored Load
(gamma)f = Partial Safety Factor for loads
                        given in SP 20.13330.2011

(gamma)f = 1.05 For weight of steel.
(gamma)f = 1.04 For weight of  Snow.


The reability coefficient for load shows how many times the design load may exceed Unfactored load.


Monday, 8 May 2017

VISIT EXPERIENCE AT WATER TREATMENT PLANT.

To become a Civil Engineer its very important to have a balance Theoretical Knowledge as well as Practical Knowledge. Eventually with the same concept our visit was organized to WATER TREATMENT PLANT at Nigdi.

The visit was plan with the intention to enhance our theoretical knowledge with practical experience.

The Water Treatment Plant is operated by Pimpri-Chinchwad Municipal Corporation  (PCMC). Water is treated here and then supplied to the entire twin city.

The Water Treatment Plant works with basic aim to make water more acceptable for a specific end-use. The end use may be drinking, industrial water supply, irrigation, river flow maintenance, water recreation or many other uses, including being safely returned to the environment.


Water treatment plant Procedure


The Operation Cycle of Water Treatment Plant.

The Water Treatment Plant  work is distributed in 6 parts.

1) Intake source management to get fullfill amount of water every day.

2) Sampling Unit.

3) Processing Unit.

4) Storage unit.

5) Supervision & Control Unit.

6) Maintenance Unit.


Pavana Dam

The Intake Source


The intake source of Water Treatment Plant plays a very important role as the intake source should be sufficient to provide every day water requirement of Plant so as to avoid shortage of water.

The Intake Source of Water treatment Plant Nigadi is Pawna dam situated nearly 4km away from the plant. The plant treats 420 MLD ( ie Milions Litres Per Day).

PCMC is planning to build fourth water treatment plant in Chikhali.The new plant will enable the PCMC to treat water that will be drawn in future from Andra and Bhama Askhed dams to meet the growing needs of Pimpri Chinchwad.

The city's population is expected to rise to 25 lakh by 2025, which means the water supplied through Pavana dam will prove inadequate. As per the plan, the areas in Pavana and Mula river basins will get water drawn from Pavana dam while the areas in the Indrayani river basin will get water from Bhama Askhed and Andra dams, located around 20 kms away. From reports for Pimpri Chinchwad, the state government has sanctioned 167 MLD water from Bhama Askhed and 100 MLD water from Andra dam.


Laboratory Tests in WTP LAB

Laboratory Treatments

The water sample from source is been treated to examine the amount of contaminants and the selection of the suitable procedure of treatment.

The is managed by Mr. Sanket Mote and he guided us with the procedure conducted at the plant.

The test conducted are:
•)Turbidity
•)pH
•)Hardness
•)Heavy metals concentration


Equipments in Lab

Turbidity test is conducted to determine the amount of mud silt and other containments in water which cant be seen through naked eyes.

Turbidity is generally high in Rainy season as compared to other season therefore extra efforts are taken at the time of Rainy season.

Turbidity can be measured using either by an electronic turbidity meter or a turbidity tube. Turbidity is usually measured in Nephelometric turbidity units (NTU) or Jackson turbidity units (JTLJ),
depending on the method used for measurement. The two units are roughly equal. At Water treatment Plant the Turbidity is measured by Turbidity Meter
HACK2100QT.

Drinking water should have a turbidity of 5 NTU/JTU or less. Turbidity of more than 5 NTU/JTU would be noticed by users and may cause rejection of the supply. Where water is chlorinated, turbidity should be less than 5 NTU/JTU and preferably less than 1 NTU/JTU for chlorination to be effective

The dosage for alum to form coagulant is determined and added after aeration to for proper sedimentation. However if the amount of coagulant is more then it affects the filtration process.


Bacterial Test

The bacterial test is conducted to determine the Pathogenic bacteria's present in the sample.

There are some types of bacterial test like

1. MPN method.
2. Radicals.
3. Single path method.

The Equipment used to conduct Bacterial test at Water treatment Plant Nigdi was Single path kit for the 3rd method.

The aim of conducting the bacterial tests  determine the Pathogenic bacteria's present in the sample so as to determine the amount of Chlorine dosage for bacterial degradation of water is designed.


Residual Chlorine Test.


The Residual Chlorine test is to determine the quantity of residual chlorine in the sample to preserve the quality  of  water supplied


Orthotolidine Test

In this test, 10 ml of chlorinated sample of water is taken after the required contact period, in a glass tube. To this 0.1 ml of orthotolidine solution is added. The color formed is observed after 5 minutes. The formation of yellow color normally indicates the presence of chlorine (either combined or free) in the water. The more yellow the color, the greater, is the chlorine residual. The amount of residual chlorine can be ascertained by comparing the colour developed in the glass tube with the standard colors already kept in the laboratory. This test, is therefore, very simple and does not require much technique or time. Under normal conditions, a lemon yellow color is satisfactory for public water supply. The orthotolidine test will normally gives the total residual chlorine present in water. However, it may be adjusted so as to give separately the quantities of free residual as well as combined residual of chlorine.

The free residual chlorine forms the yellow color during the first 5 seconds of the addition of orthotolidine, while the combined residual chlorine goes on forming the colour for about 5 minutes. Hence, the colour after 5 seconds will give the quantity of free residual chlorine, and the colour after 5 minutes will give the free and combined chlorine. The difference in value between the two values is the combined chlorine.

The orthotolidine test, however, is not accurate, because the impurities such as iron, manganese, nitrate etc., are likely to cause a false yellow colour, and indicating wrong and increased chlorine residual.


Cascaded Areator

Aeriation unit

This  is  the  starting  unit  of  the  water  treatment procedure. Once  the  sample  is  tested  the  water  coming from  Ravet  is  pumped  through  this  cascaded  aerator.  The purpose  of  having  an  aerator  is  to  improve  the  amount  of dissolved  oxygen  in  the  water  and  to  release  the  other gases,  also  a  few  metals  get  oxidized  during  this  procedure.

This  procedure  is  important  to  make the  water  odorless  as there  is  transmission  of  gases  during  this  process. Water is allowed to freely  fall  on the  cascaded steps and  which  each  fall  the  water  particles  are  exposed  to  the fresh  air  from  the  surrounding.  This  process  promotes  the exchange  of  gases  like  CO2,  etc. 


Clariflocculator

This is the second unit placed after Aeration unit.

flocculation  is  the  central  portion  of  the  tank  which  consist  of  a  mixer  that  is rotating  at  a  low  speed  to  facilitate  the  collision  of  the  charged  particles  and  their  conversion into  sludge which are  settled  down.

The water contains negatively charged particles whose amount is been analyzed and the same quantity of positive charged particles are supplied in so as the positive charged particles and negative charged particles gets attracted to each other and as the size of this particles increases they settled down in Sedimentation zone.

Sedimentation zone is the outer zone which is curved in nature and there is depression at the center.

The  water  is  having  a  detention  time  of  0.5hr  in  the  flocculation  and  3hr  in  the sedimentation  zone.


Chlorination Unit

Chlorine is used to destroy disease-causing organisms in water, an essential step in delivering safe drinking water and protecting public health. Chlorine is by far the most commonly used disinfectant
in all regions of the world. Where widely adopted, chlorine has helped to virtually eliminate water- borne diseases such as cholera, typhoid and dysentery. Chlorine also eliminates slime bacteria, molds
and algae that commonly grow in water supply reservoirs, on the walls of water mains and in storage tanks. Only chlorine-based disinfectants leave a beneficial “residual” level that remains in treated
water, helping to protect it during distribution and storage. Chlorine is a versatile and low-cost disinfectant appropriate for any size water system, whether it serves a remote rural village or a large modern city. Where piped water supplies are not available, chlorine can also be used for treating water in individual households. Specially-packaged chlorine
bleach can disinfect household water.


However there are other disinfectants too like UV, Ozone, Boiling, Potassium Permaganet. But the main objective of adding disinfectant to water is to provide safe drinking water till it reach large span consumers. Therefore chlorine is the best option which satisfy all the requirements.


Storage  unit  and  pumping

In  this  unit  the  treated  water  is  allowed  to  stay  for  sometime  and  them  pumped  to the  distribution  network  by  using  mechanically  operated  pumps.  The  plant  is powered  by  electricity  from  the  MSEDCL


Filtration unit

This  is  a  big  unit  comprising  of  a  number  of  filter  pits.  The  filter  used  in  this  tank  was rapid  sand  filter  in  which  the  water  is  allowed  to  pass  through  the  sand  and  it  gets  filtered  as it  passes  down  under  the  action  of  gravity.  The  sand  is  having  small  pores  which  allows  water to  pass  through  it  preventing  the  suspended  matter.

During filtration the water enters the filter through upper valve, moves down towards the filter bed, flows through the filter bed, passes the underdrainage system (filter bottom)and flows out through lower valve. The unit used to measure filtration rate is actually the approach velocity, which is the inflow rate (m^3/h) divided by the filtration area (m^2).

When, after a period of operation, the filter rate controller is fully opened, further
clogging of the filter bed cannot be further compensated and the filtration rate will fall.
The filter is then taken out of service for backwashing.

For this, the upper and lower valves closed, and upper back wash valve  is opened to drain the remaining raw water out of the filter. A few minutes later lower backwash valve  is opened to admit the wash water.

The backwash rate should be high enough to expand the filter bed by about 20% so that the filter grains can be scoured, and the accumulated deposits carried away with the wash water. The wash water is collected in the wash water troughs from where it drains to waste. When the backwashing is completed, backwash valves  are closed and upper valve  is re-opened, admitting raw water to begin a new filter run.


Use  of  Supervisory  Control  and  Data  acquisition (SCADA)


This  plant  employs  one  of  the  most  advanced  techniques  for  its  daily  operations.  SCADA  is  a cloud  based  tool  that  is  developed  for  the  plant  and  helps  the  plant  management  to  monitor  and control  the  daily  activities  at  the  plant  in  the  supply  network.

Diagram Explaination

Level 0 contains the field devices such as flow and temperature sensors, and final control elements, such as control valves.

Level 1 contains the industrialised input/output (I/O) modules, and their associated distributed electronic processors.

Level 2 contains the supervisory computers, which collate information from processor nodes on the system, and provide the operator control screens.

Level 3 is the production control level, which does not directly control the process, but is concerned with monitoring production and targets.

Level 4 is the production scheduling level.


I would like to thank Civil Department of Trinity College of Engineering for conducting the visit to Water Treatment Plant Nigadi. Especially  Meenakshi Khapre mam  & Harshal sir for conducting the visit.

I would also like to thank
Mr.  Praveen  Ladkat Executive  Engineer,  PCMC for allowing us to visit the plant and to grab the pratical experience.


Thursday, 27 April 2017

SCUBA DIVING JOURNEY

1 Maharashtra Naval Unit NCC, Mumbai  conducted  the SCUBA Diving Camp 2014-15 at Command Swimming Pool of the Western Naval Command, Mumbai for the cadets representing all the seven Groups of Maharashtra Directorate. They are Mumbai ‘A’ and ‘B’ Group, Pune Group, Amravati Group, Kolhapur Group, Nagpur Group and Aurangabad Group. This camp includes cadets from Navy, Army and Air Wing from various parts of Maharashtra.

The Main Objectives of Camp :-

•) To expose NCC cadets to SCUBA Diving and Survival at Sea.
•)To build confidence amongst participants to voluntarily undertake waterborne rescue operations like flood relief, natural calamities etc when need arises.
•)To inculcate the spirit of adventure, camaraderie, character building, team work and ability to willingly face adverse conditions & hardships together.
•)To enjoy underwater flora and fauna.
•)To expose cadets to take up diving as a career option.

Camp Selection:

Western Naval Command has extended all facilities for conducting this camp at the Command Swimming pool located in Navy Nagar, Colaba. The Command Clearance Diving Team (Mumbai) has provided Diving equipment and Diving instructors to conduct the camp in both theory and practical classes on Diving. The camp was conducted from 06 Jul to 12 Jul 2014 which included swimming, medical and physical fitness tests. A total of 50 Cadets – 18 Girls and 32 Boys participated in screening and selection, out of which 30 cadets – 10 Girls and 20 Boys were selected for phase II training (which includes the actual exposure to SCUBA Diving) from13 Jul to 26 Jul 2014


Phase 1: Selection Procedure

The selection procedure was divided in 3 parts-

a) Ground Test.
b) Swimming Test.
c)  Medical Test.


Ground Test was conducted at Kholi Stadium at South Coloba in south Mumbai.

The Test includes
1) 2km Run
2) 20 Push Ups (2 sets)
3) 15 Pull ups (2 sets)


Swimming Test was conducted at COMMAND SWIMMING POOL Colocated with Kholi Stadium in South Mumbai.


The swimming test Include a 400m Swim with the time limit of 4 min.


The final test was Medical Test was conducted in INS ASWINI HOSPITAL situated in South colaba. The test was divided in 4 parts.

1) ECG Test.
2) Chest xray test.
3) Ear Audioable test.
4) Chamber test.


The test were conducted to know the potential of cadets whtheir they are physically fit for the traning of Scuba diving.


The day used to start with a 2 km run in kholi stadium. Further we used to deal with ground exercise for next 2 hours.

After ending up with ground sessions for 3 hours. we were granted a break of 10 min.

Then we were taken to the Command Swimming pool and were granted traning on use of scuba diving equipments.

We had traning sessions on using the mask and snorkel.Further we learned the use of fins.

After sucessfully learning use of mask,snorkel and fins. we had a session on how to wear scuba diving equipments in short span. This was the most important session in scuba diving.

Next session was on how to communicate with diver through bells. This communication network in language of bells (ie a Nylon rope tied to shoulder on which is pulled and streched to communicate known as bell). We also had the jump session from 15fts approx.


Also in the evening we had lectures on different topics related to Defence.


On the second last day of camp all the cadets were taken to Naval dockyard to visit the Indian Naval Ship Trishul. It was a great experience to visit the dockward to see the different types of ships, Submarines etc. We were lucky enough to see the Ins Virat Standing in Mumbai Dockyard.

We had sessions on How the Radar system, Sonar System works. We also had sessions on how to circulate within the ship with the help of maps. We also visited the control room of ship from where the ship is been operated.


It was really a great experience to live the navy life at such a young age. I am fortunate to be the part of Scuba diving camp.


Sunday, 18 December 2016

Surveying Internship with Nyati Builders


Session 1: Introduction to Survey

•)This session stated the importance of Surveying  in Civil Engineering.
•) Surveying is the technique of determining the relative position of different features on, above or beneath the surface of the earth by means of direct or indirect measurements and finally representing them on a sheet of paper known as plan or map.

•) The most useful instrument in Surveying is Total Station which gives highest accuracy to measure readings. Total Station is multiworking instruments which offers you to perform all the functions of other instruments such as Prismatic Compass ,Autolevel, Dumpy level, Plane Table  Theodolite, Tachometre etc


•) As Single instrument performs all the surveying work. Thus in this internship we learned the pratical working of Total Station on Sites.


Session 2: Theory Of Total Stations.

•) In this sessions we came to know  how Total station simplifies the survey work.

•)We were directed with the details of the instrument which was divided in 3 sub sessionsþ

Session 2.1)   brands of Instruments.

In this session we were guided with the different Manufacturing brands of  Total Station. We were also guided with the different Apps  License versions used.

Session2.2: Introduction to components of Total Station.

In this session we were guided with  components of Box, components of setup, components of Instrument.

•Components of Box includes-
Battery, Charger, Protective Cover, Data-Cable, 4×300mm Reflector Cods, Mini prisim, Charger, Adapter.

• Components of Setup-
Tripod stand, Round Prisim, Umbrella ( used only when raining occurs to protect instruments).

• Components of Instrument:
Foot screw, vertical screw, Horizontal screw, Battery setup, Magnifying lens etc
     
Session 2.3:  Features/ Programs  of Total station.

In this session we were guided with different programs of Total stations like
- Station Setup
- Survey
-Stakeout
- Ref. line
- Ref. Arc
- Tie Distance
- COGO
- Area & Volume
- Remote height
- Traverse
-Road 2D
- Road 3D
We were guided with small demo  of each program.

Session 3: Demo of using the Instrument

In this session we were given breif demo of using the instrument.

S1) Proceducre Setting up Stations for survey
S2) How to level instrument
S3) And to start the instrument
S4) Orientation of the equipment
a) Methods avaliable for Orienting the instrument
b) when to use which method
c) Limitations of each method
d) Precautions to be taken
S5) Stake out of existing work
S6) Changing stations for continuation
S7) Back sighting & orientation
S8) Checking Accuracy
S9) Office work (Autocad works)

Session 4: Practicing Instrument Operation.

In this session we were given chance to operate the instrument to plot the compound wall of Nyati empire by using Total Station and its setup.


I (Gaurank Patil) and Shadaab Sayyed are very thankful of Nyati builders  to grant us site experience of using Total station. We would like to thank Gatpande sir, Amol jadhav sir, Ganesh Sir, Salunkhe sir, Rahul sir and Datta sir for providing us with their experinece and knowledge.

Tuesday, 18 October 2016

U.S.A Presidential Elections.

Source - Google Images

The United States presidential elections are scheduled on 8th of November 2016. As everyone is eager to know the next president of America whether Hillary Clinton or Donald trump will win, But if we look at their electing system it's far more different than that of  world's largest democracy India. U.S.A has a federal system of  Democracy. U.S.A has two major houses were the decision making of the united states is done. The houses are 

1] House of Representative
2] Senate

SENATE: Senate is consider as  upper house which consists of 100 members that is 2 members each from 50 states.
HOUSE OF REPRESENTATIVE: This house is consider as the lower house which consists of 435+ 6  members.


VOTING SYSTEM OF UNITED STATES:  The voting system for presidential elections changes according to state government.

1] 34 States members register as voters of a particular party, whereas 16 state members register independently ( that is same as that in India).
2] If a candidate of a particular party wants to register his name on Ballet paper (ie to contest election) he should get nearly 50%  of members of that party.
3] Candidates for elections in U.S.A are chosen by party voters who have registered as party voters.
4] People elect the electors and electors vote for President.


DRAWBACKS: There are several drawbacks in electing system of united states.

1] Basically its a 2 party system.
2] Voter driven primary.
3] Party get administrative power only.
4] Their system is No choice system.
5] Absence of Program and Ideology in Party.
6] Unequal distribution of seats regardless of population which leads to unequal value of vote.

I would like to thank MIT School Of Government for having seminar on this topic.

Thursday, 29 September 2016

Nss day cleanliness Program Swacha Bharat Abhiyan.


Swachayata Abhiyan Program was orgainsed on the occassion of National Service Scheme Day. Being a part of it was a great privilage to clean the college playground and its premises. We all Nss members took oath to work for the cleanliness of our surroundings and to work for 100 hours per year to make our nation "CLEAN".

Making our nation clean would lead us to attract the tourism as well as we all would eliminate the infectious disease from our surroundings which would help us to overcome the health problems too.

So I request you all to keep our surroundings clean and motivate others to maintain cleanliness.

Thursday, 22 September 2016

Seminor On Geotechnical Engineering Applications and Opportunities


Seminor On Geotechnical Engineering Applications and Opportunities.


session 1: Application of Geotechical Enginnering in Konkan Railways.

Speaker : Dr Ketan Gokhale the Ex Managing Director of Konkan Railway, Currently Director of Dimple International Pvt.Ltd Pune.

- In this session the speaker addressed us with different types of geotechnical aspects of konkan railway project. He told us about the different Innovations in railways as per time like Re-sloping, Grading, Catch-water Drains.Some methods of avoiding soil eroision like plantation, Toe walls implementation etc which further helps in avoiding landslides of rocks on railway tracks. He also shared his experience of working in Kashmir Railways and showed us the Arch railway Bridge of span 359m high from ground level through Ppt.


Session 2: Basal Reinforcement & Ground Improvement.

Speaker: Annapoorni Iyer, Assistant General Manager Maccaferri Enviormental Solutions Pvt Ltd India.

-In these session speaker asdressed us on the Basal Reinforcement techqunies. She told us about the different techniques of hardning the soft soil. She thought us the preparation of basal reinforcement by geosynthesis materials. She also shared the standard IRC 113 code. She shared the case study and making of Sikkim airport through her ppt's.


Session 3: Rock fall Protection

Speaker: Tiru Kulakarni, President Gaware Wall Ropes Pvt Ltd

--In this session speaker addressed us with different landslide protection techniques. He shared the working process of site reconnaissance  in which the Block size, Interface friction,Slope conditions, weak rock mass identification etc.

It was a great learning experience to get detail application knowledge about Geotechnical Engineering.

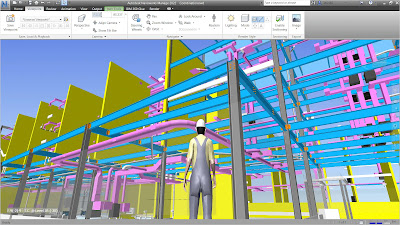
3 Simple Steps to Create 3D Walkthrough using Navisworks

3D Walkthrough is created for an exciting experience to showcase exact replica of project that will be created in future. Walkthrough movie ...